Apologies for the late posts, had a nasty cold for about a week there and the rest of the time was spent finalizing ConsoleBox.
Alright, not all of that is true. SOME time was spent on ConsoleBox, but let us not forget we were just through the hurricane that is the summer Steam Sale, so that was where any free time was spent (and I finally got into a pool for the first time this summer). I picked up some nice goodies including Dust:An Elysian Tail, Fez and the new Tomb Raider.
Anyhoo, some housekeeping items are finally being resolved. There were a few issues with Dolphin (Gamecube and Wii emulator), one of them being a ~90% crash on startup that for the life of me I could not fix. Error logs brought me to something with DirectX, but after trying everything under the sun relating to DX I could not fix the problem. How I finally resolved it was by using the 32 bit version! I am filing this one under don't know, don't care, so fuck it.
There was also an issue getting the Gamecube controllers C sticks to properly center. After playing with the GCPad dialog box in Dolphin I found an unnamed feature where clicking the image of the analog sticks brings up more configuration options. Pure luck, and that was fixed.
The main thing that is being an asshole to me currently is Xebra (PSX Emulator) and configuring it to work with analog sticks. This may be left as digital only for the time being, as I either wait for more information to surface or a new version.
Doing some final testing tonight, if the fates are kind and I finish I'll put up a video of it in action.
Tuesday, July 23, 2013
Sunday, July 7, 2013
NES Box, Revisited
One of the issues I am correcting going forward is not skipping around everything that I do around here. When Daniel and I made the NES Box we really did a lot of work and did not post anything close to what we did. While a lot of the step by step is lost to the anals of time (I know that's spelled wrong :) I did come across some pictures of the process. So let's step in the old time machine and go way back to 2011....

The pictures below are what we started with. This was the original NES we got back in Christmas of 1987, and it was decorated with the destruction of childhood. Apparently we liked stickers. And scratching the shit out of the case.

The first step was to clean up the case by removing the stickers and sanding down the outside with very fine sandpaper. Dremeling out the raised bottom was next, as we needed every centimeter we could get.


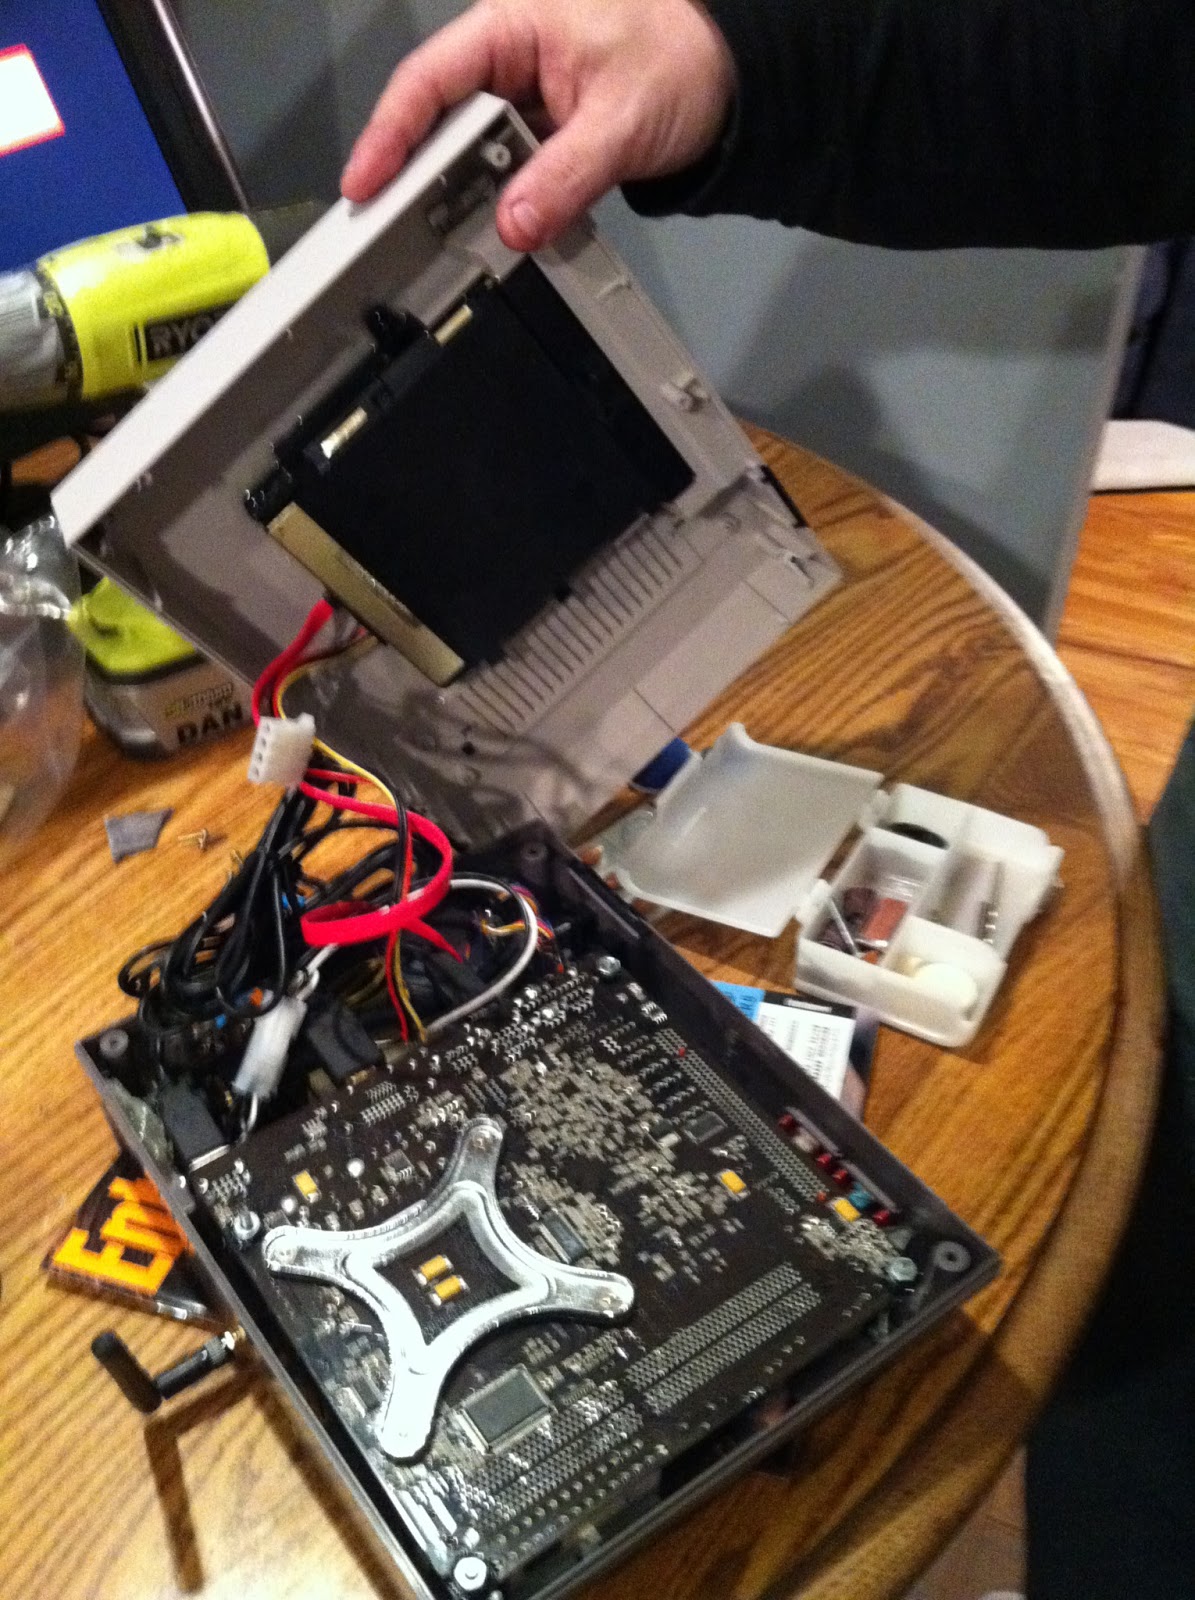
We had our motherboard (Mini-ITX) and we had our case, but how to combine the two? Easy! Suspend it like a bat(man). Actually no Batman, just suspended like a bat.

Once we received the USB boards from Retrousb soldering the existing NES ports was a piece of cake. I even did one myself, being the one and only thing I have ever soldered. ROB also makes a cameo as he really wanted to be included in the process, even though all he did was drink and criticize the entire time...


Hard drive in a cartridge. In retrospect I regret using the gold cart but what's done is done.


Field testing the parts, making sure it work's BEFORE it's in the case.

Assembling the beast, with a Pico power supply. HDMI & power cable being ran from the mobo to the back. When I say this thing JUST fit I do not exaggerate, I am really surprised it actually worked.


Of course having more experience now we could do it much better (news of tat may be coming soon right here) but as of this date it is still running great and is a great hit at our parties, having found a semi permanent home in the garage at the tiki bar, with people sitting and playing at the bar.

The pictures below are what we started with. This was the original NES we got back in Christmas of 1987, and it was decorated with the destruction of childhood. Apparently we liked stickers. And scratching the shit out of the case.

The first step was to clean up the case by removing the stickers and sanding down the outside with very fine sandpaper. Dremeling out the raised bottom was next, as we needed every centimeter we could get.


We had our motherboard (Mini-ITX) and we had our case, but how to combine the two? Easy! Suspend it like a bat(man). Actually no Batman, just suspended like a bat.

Once we received the USB boards from Retrousb soldering the existing NES ports was a piece of cake. I even did one myself, being the one and only thing I have ever soldered. ROB also makes a cameo as he really wanted to be included in the process, even though all he did was drink and criticize the entire time...


Hard drive in a cartridge. In retrospect I regret using the gold cart but what's done is done.


Field testing the parts, making sure it work's BEFORE it's in the case.

Assembling the beast, with a Pico power supply. HDMI & power cable being ran from the mobo to the back. When I say this thing JUST fit I do not exaggerate, I am really surprised it actually worked.
And the finished product!


Of course having more experience now we could do it much better (news of tat may be coming soon right here) but as of this date it is still running great and is a great hit at our parties, having found a semi permanent home in the garage at the tiki bar, with people sitting and playing at the bar.
Wednesday, July 3, 2013
HyperLaunch 3.0 Kicks Hyper-Ass (Apologies, I had to!)
A few days into the new HyperLaunch and I am extremely impressed.
I started to do an upgrade as outlined by the steps on the new HyperLaunch site but after 20 or so minutes I felt starting from scratch would be the easiest way to go. My folder names were all out of whack and disorganized and this would be a good way to get it all cleaned up.
After downloading a fresh install of Hyperspin and adding the applicable HyperLaunch files I was off to the races. First, how exactly is this different from the old HyperLaunch? This is like going from McDonald's into a 5 star restaurant. The HL team wrote an ENTIRE GUI application, which so neatly and logically organizes things you will never know how you lived without it.
2 hours in I had MULTIPLE systems setup completely, only because I knew exactly where to link in all the options, and could easily look at the (very helpful) module notes if something didn't work.
I
even took this new found rhythm and fixed a few things that have been
bugging me for awhile, that I had previously hit some brick walls on.
For example, for the Famicom
Disk System, some games require a disk eject, a side switch and an
additional disk eject (presumably re-inserting the disk). Well that's
all pickles and ice cream, but mapping that to a controller did not come
that easy. It actually was extremely easy to do in XPadder, I just had to find the correct way to do it.
In short this thing is fucking incredible. I have spent the past few days making minor tweaks and perfecting certain things. I feel like the end is finally in sight with this project and am getting quite excited about the prospect. I am also going to make some artwork and get the PC case wrapped in vinyl to make it look especially awesome (and will be subsequently posting pictures here).
It's a good thing too, because yesterday I picked up my (slightly beat up) Ms. Pac-Man cocktail table machine, which needs a little work.
I started to do an upgrade as outlined by the steps on the new HyperLaunch site but after 20 or so minutes I felt starting from scratch would be the easiest way to go. My folder names were all out of whack and disorganized and this would be a good way to get it all cleaned up.
After downloading a fresh install of Hyperspin and adding the applicable HyperLaunch files I was off to the races. First, how exactly is this different from the old HyperLaunch? This is like going from McDonald's into a 5 star restaurant. The HL team wrote an ENTIRE GUI application, which so neatly and logically organizes things you will never know how you lived without it.
2 hours in I had MULTIPLE systems setup completely, only because I knew exactly where to link in all the options, and could easily look at the (very helpful) module notes if something didn't work.
 |
| Finally got FDS to switch disk sides via NES controller! |
In short this thing is fucking incredible. I have spent the past few days making minor tweaks and perfecting certain things. I feel like the end is finally in sight with this project and am getting quite excited about the prospect. I am also going to make some artwork and get the PC case wrapped in vinyl to make it look especially awesome (and will be subsequently posting pictures here).
It's a good thing too, because yesterday I picked up my (slightly beat up) Ms. Pac-Man cocktail table machine, which needs a little work.
Subscribe to:
Posts (Atom)