It's been awhile since we've done anything, and in the never ending battle to stave off boredeom we are attempting a controller mod I read about on the Hyperspin forums. It is basically a USB hub with a stripped down flash drive soldered inside of a controller (in this case SNES). The idea is then you plug in the controller to the PC via USB and everything runs off of the flash drive, thus running off of the controller.
There is an even the idea to build a USB port into the top of the controller so you can add a second player. How in the fuck that gets configured I have no idea, but (hopefully) we will figure it out.
Wednesday, December 14, 2011
Wednesday, May 4, 2011
Retro Fool #2 is here
Just letting it be known that Retro Fool #2 is now ready for action on the blog and will be contributing to all our upcoming projects.
Monday, May 2, 2011
NES Mod, Complete!
 I am 2 weeks late in posting this, but the NES Mod is finally finished. Putting all of the final pieces together was a bit of an ordeal, because as you are closing the top and bottom together you find small pieces of plastic that prevent the case from fitting snugly and you are trying to modify it without hurting any of the electronics inside.
We glued the piece that holds the cartridge on to the top and it worked well. A nice touch that I'm sure someone will appreciate it that we cut off the RCA jacks off of the original motherboard and stuck them where they were. They don't do anything, but it makes it look more original. Really the only changes from a real NES is the back ports and the wireless antenna in the back.
Below are pictures and a crappily made video on the operation. All of our goals have been met with this project, it is completely controllable from the NES controller, user friendly and is able to watch Netflix to appease the female contingent of the household.


Monday, April 11, 2011
NES Mod, small victories, small defeats
The pico power supply came today so I was all pumped up to get this whole thing together. I cut off some audio mobo connectors from an old case and soldered them with the original NES power switch and LED. I screwed the wireless antenna to the back. I then started lowering the mobo in, gently......gently.....and then BAM.
The motherfucker wouldn't go down! The small amount that the power supply juts out is just enough to keep the motherboard from going down into the case! So naturally I was pissed, and called the other retro fool which gave the suggestion of an atx extension cable which is the route we are going to go. If that does not work we will try to bend the screws over, but that is not our preferred course of action.
Having nothing else to do I decided to hook it all up and see what I got. I've never used a pico power supply before, nor have I soldered power buttons. I plugged everything in and it worked on the first try. My buddy and I then spent the next hour playing Ducktales and R.C. Pro Am. We are in the home stretch folks.


Friday, April 8, 2011
NES Mod, Controller ports
The USB adapters came for the controller ports today, and I was a tad nervous since my brother usually does the soldering round these parts. He was not here tonight so I sucked it up and gave it a shot. After following a very easy to read wiring diagram on the retrousb web site, I got to it. My first attempt did not work, and after I inspected the soldering job I did it was no wonder. It looked like complete shit, I think the solder was embarrassed to even be on there. After a more meticulous attempt, I plugged the usb into the pc and a controller into the port and........success! I'm very proud of myself (and yes I know this is the easiest shit ever). Everything else besides the pico power supply has arrived so we should be done within a week!


Thursday, April 7, 2011
NES Mod - Aesthetics!
Small update, the re-finishing of the casing is complete, stickers removed and plastic sanded down so it has that "New 80s Shine." All parts are now on order and we are waiting for them to come in. A few pictures below.


Friday, April 1, 2011
NES Mod, oy vay
Well, after configuring Superbox, you would think a simple 1-2 system setup would be cake, right? WRONG! The problem comes from using only 1 control method (NES Controller) which does not have a lot of buttons. The second problem comes from configuring Hyperspin. When HS closes a game, it pretty much brute force closes the program and the program does not shut down normally. Because of this, any changes made while the emulator is running is not saved. This has not been an issue thus far, but this also means that games are not saved. Any progress made in Zelda, Final Fantasy, or anything with a save feature will be lost. So the journey to find a solution began!
I won't bore you with the many details of what I've been trying to do, but most of it sucks. I'm to the point where I can get the emulator closing with saving from HS, but can't do it from the controller.
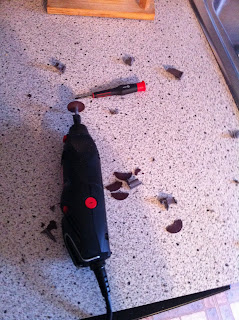
I've also been having some fun with my dremel. I took out the raised part of the plastic on the bottom of the casing and sanded down the excess plastic. I did take off a screw hole mount that the power button needs, but that won't be a big deal to fix. (I went through a few cutting pieces while doing this as you can see below)
I've also made a custom boot and login screen for Windows 7 to help mask the fact that it's Windows 7. Of course you are still going to be able to tell it's a PC when booting, but there are some things you can't avoid.
So for a short checklist, all of the NES data is on there, I've decided to add Game Boy as well since it was an 8 bit Nintendo System, and of course Boxee for Netflix (which I found wheel art for on the HS FTP site!) The motherboard (obviously) is here, kits are on the way to convert the original controller ports to USB, and I still have to order the pico psu.

I won't bore you with the many details of what I've been trying to do, but most of it sucks. I'm to the point where I can get the emulator closing with saving from HS, but can't do it from the controller.
I've also been having some fun with my dremel. I took out the raised part of the plastic on the bottom of the casing and sanded down the excess plastic. I did take off a screw hole mount that the power button needs, but that won't be a big deal to fix. (I went through a few cutting pieces while doing this as you can see below)
I've also made a custom boot and login screen for Windows 7 to help mask the fact that it's Windows 7. Of course you are still going to be able to tell it's a PC when booting, but there are some things you can't avoid.
So for a short checklist, all of the NES data is on there, I've decided to add Game Boy as well since it was an 8 bit Nintendo System, and of course Boxee for Netflix (which I found wheel art for on the HS FTP site!) The motherboard (obviously) is here, kits are on the way to convert the original controller ports to USB, and I still have to order the pico psu.


Monday, March 28, 2011
Upcoming Projects!
Lately we have been flip flopping between a few projects and finally have a path thanks to a few funny circumstances. After taking apart a few of the PCs around the house I've realized that I will be breaking the unspoken Netflix rule with my girlfriend, said rule being that she is always able to watch it in our bedroom and in the living room. As I value my life, brainstorming solutions was first and foremost on my mind. Well, my mother has an old roku box she doesn't use, so that's one problem solved. Now onto why you care about all of this.
I am taking the huge living room pc out to use in our console project you will read about below. Now I could put in a roku box or something similar but what fun would that be?! We have been tossing around the idea of modding an original NES and it seems like there's no time like the present! Originally it was going to a fully masked box with custom boot screens and Hyperspin running in a shell. However this Netflix-for-my-girlfriend problem presents another layer of complexity.
The challenges from the original design are:
-it needs wireless
-it needs to be able to switch between HS and Boxee (the media program I choose) with either a NES controller or a windows media remote.
- it needs to have said USB remote sensor plugged in.
I chose a Zotac G43 Mini ITX motherboard, which has a built-in wifi card, Some of the reviews say the wireless is pretty much shit, but we're going to have to take a gamble on it. I believe I can just put Boxee in Hyperspin as if it was an emulator, I just hope exiting out will be just as easy. And finally, I will just have to run the USB cable for the remote sensor inside the case, as I do not want any USB ports showing on the NES.
Ok, we have a plan! I went out and bought a dremel to remove all of the inside plastic of the NES that we don't need. Below are before pictures. I know we still have to remove all of the stickers from the 80s that are on there, and most likely re-paint the entire case. By the way this is the original NES that we grew up with, received on Christmas 1987 and it is what started us on this long, long road.


So far, the mobo and CPU fan (low profile) has been ordered, as well as the USB NES controller ports. The small power supply (called a pico PSU) has not been for complete lack of funding. But at least with these parts we can get going on the configuration and aesthetics of the outside.
I am not going to get into the consolebox project right now, sooooooooo to be continued!
Friday, March 25, 2011
Superbox!
Even though it is already completed, I will try to explain everything about the creation of the being known as Superbox.
Plans were create by Daniel, based off of some pictures from this guy's post. He did do some alterations, but exactly what I can't tell you as I am not the woodworker fool. Anyhoo, once the pieces were cut out, they were wrapped in a shelf paper type vinyl from Home Depot, and screwed together. In retrospect we should have filled the screw holes in with putty and sanded it so everything was nice and smooth, but instead we covered the holes with circular vinyl pieces, which does not look bad at all.
Once we got that together, we put together the control panel, which wasn't as hard as we had originally thought. Just some hole drilling and some wire daisy chaining and we were in business. We decided to go with 4 buttons per player due to space limitations (this thing IS a mini cab), with a 1 and 2 player button, and a coin insert button on the two sides.


This is when things started to slow down a little bit as we got to the more complicated stuff. Luckily I ordered some screw mounts from Ultimarc, the company that sells the joysticks, buttons and PC interface for them. We were able to screw these directly into the bottom base of Superbox, ensuring that the mobo would not move around. it was all going fine and dandy until we realized a small design flaw -
THE MONITOR WOULD NOT FIT!!!!
There was nowhere for the monitor to sit without crushing the motherboard and there was really no where else to put the monitor. So after a few F Bombs and some quiet sobbing in the corner (AND a quick trip to the hardware store) Daniel had the wildly wonderful idea to hang the damn monitor upside down like a bat.
Thanks to a windows (or nvidia) feature to display at 180 degrees, this caused very little headache and we were back in business. The hard drive was mounted to the back of the wood holding the monitor, and Superbox was functional, but not yet finished!
The rest of the work was mainly cosmetic and I will list it briefly here. We got a small 12 inch florescent light to go behind the marquee. The marquee was printed at kinkos (where I used to work) but it took a few times to get a good backlit printout with a good lamination. That is attached to a piece of plastic, that's wedged into the top, lined with vinyl.
We ordered 2 small (but surprisingly powerful) HP speakers from best buy and just velcro'ed them to the top sides with industrial strength velcro, complete with a small headphone volume adjuster wheel. We left a good part of the back top open for speaker sound and for ventilation. The bottom of the door has a small cutout where we put the small USB panel that used to be in the front of the Dell computer this thing used to be, so you could easily plug in and USB device or headphones easily.
The monitor was covered with a piece of plexiglass screwed into a wood frame and covered with, you guessed it, vinyl! We spliced the original power button (as it wasn't practical in this box) and wired to a nice big red button that is sticking out of the bottom left side of the machine.
I apologize if this all seems rushed through, I am typing this out in one sitting trying to remember how we went about things. I realize I have not even touched on the software side, but for now just understand that this thing is 100 percent controllable from only the buttons that are there. Below are some pictures and expect a follow up post at some point with everything that I missed! Thanks for reading!


Welcome to the first post on the Retro Fools Game Modding Blog. First you may ask, "Who are these fools?" We are two brothers that decided to one day build a small MAME box, after thinking about it for years. And after we did, the realization came that there is absolutely nothing stopping us for doing some really cool stuff in the way of classic gaming builds/mods/whathaveyou. Let me preface by saying so far nothing we have done has been completely original ideas, when we see something we think is cool we do it, borrowing from whatever good ideas the person who we originally looked at had. After all, actual doing is most of the battle (and the fun).
So far we have completed our first project, SuperBox, which is a 2 player tabletop arcade system, with a PC inside, running a front end called Hyperspin and running many classic console (and the MAME) emulator. I will post what pictures we took, but they were not many, due to the fact that we did not really think to document it. Future projects will be a little more in depth. Our next project is going to be a NES case modded with a PC inside, followed by a full size arcade cabinet.
I really don't expect to see many visitors, but hey you never know, and if you see something you like or just want to say hi, feel free!
Subscribe to:
Posts (Atom)